Make your first HTML deck
Start with a proposal outline. Your AI makes the HTML file; Renza gives it a link, review comments and version history. This walkthrough uses Codex in a local folder, on your own account. The HTML format works with other tools too.
Already have an HTML deck? Upload it or skip to Publish and keep your deck below.
What you need
- A coding agent such as Codex that can read and write files in a folder on your computer, signed in to your own AI account.
- Node.js with npm and npx available if you want to use the terminal commands below. Ask your agent to check
node --versionandnpx --versionfirst. The CLI requires Node.js 18 or later; use a currently supported Node.js release. - An approved proposal outline. If you currently use Google Slides or PowerPoint, copy the approved text into the brief. This walkthrough does not convert those files.
- A Renza account to keep the deck and collect review comments. You can publish a temporary guest deck before signing in.
1. Download a complete example
Download the agency proposal starter kit, then unzip it into a new folder called agency-proposal.
The kit contains a six-slide website redesign proposal by Studio North for Fieldwork Studio. Both are fictional. The content covers objectives, approach, scope, timeline and next steps; it does not claim customer results.
Open deck.html from the unzipped folder in your browser. Scroll through all six slides to see the finished example. Local preview shows a scrolling document; Renza adds slide navigation after publishing.
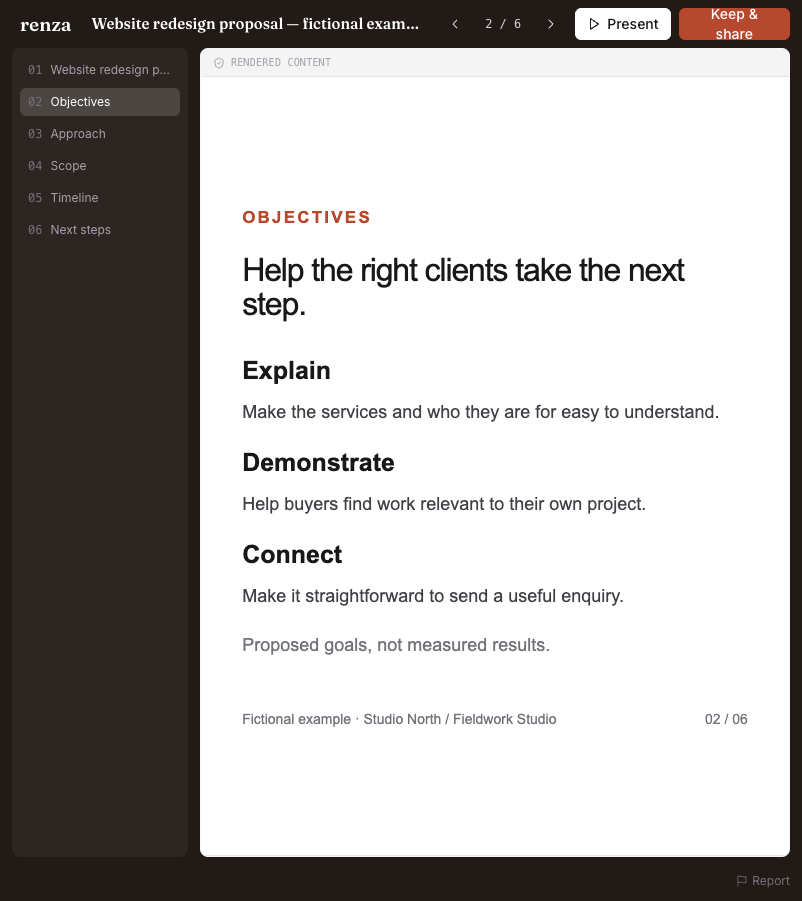
After uploading: select a slide in the left column to check it, choose Present for presentation mode, or Keep & share to save the deck to your account. This is an actual local preview of the included HTML.
| File | What to do with it |
|---|---|
brief.md | Replace the fictional brief with your approved content, or leave it unchanged for practice. |
generation-prompt.md | Paste these instructions into Codex to create your deck. |
deck.html | The example; your AI will edit this file. |
revision-prompt.md | Use after a reviewer leaves feedback. |
README.md and LICENSE.txt | Setup instructions and permission to reuse the kit. |
There are no separate images or fonts to download. If you later add your own assets, use ones you have permission to include and keep them with the deck.
2. Open the folder in your AI tool
Open the unzipped agency-proposal folder as your project or working folder in Codex. Start a conversation there. Open brief.md in a text editor and replace the example with your project details, then save it.
Open generation-prompt.md, copy its contents and paste them into that conversation. The prompt asks the agent to write a file called deck.html in this folder, rather than returning code for you to copy manually. It includes Renza's slide format, so you do not need to learn HTML first.
For a quick practice run, you can paste this shorter instruction:
Read brief.md and generation-prompt.md in this folder. Follow the generation
instructions and write deck.html here. Tell me its exact location when finished.
Do not publish until I have previewed it.
If your AI only returns a chat message, ask: “Write that as deck.html in this project folder and tell me the file path.” See troubleshooting if the tool cannot create local files.
3. Preview the actual file
Open the saved deck.html in your browser. Check every slide for accurate content, readable text, missing images, clipped lines and unwanted claims. Resize the browser to a narrow window too. Tell your AI what to fix, save the changes, and refresh the preview.
In a terminal opened in the agency-proposal folder, run:
npx renza check deck.htmlYou can also ask Codex to run that command. Fix reported warnings before publishing. This checks the slide structure; it does not prove the visual layout is correct.
4. Publish and keep your deck
Run this in the same folder, or ask your agent to run it after you approve the preview:
npx renza publish deck.htmlOpen the link printed by the command. If you are logged out, this creates a guest link that expires after seven days. To keep it and enable review sharing, run:
npx renza loginApprove the login in your browser using the account you want to own the deck. Login claims guest decks published by the CLI from this machine; their existing links redirect to the kept decks. You do not need to upload again just to keep the deck. If you were already signed in when publishing, it is already in that account's workspace. Use npx renza me to check the current account and workspace.
Prefer uploading in the browser? Open the upload page and select deck.html from the unzipped folder. Use the Keep this deck flow shown for guest uploads. The CLI instructions above are the simplest way to repeat this walkthrough at the same link after a revision; browser uploads are a separate entry path.
5. Ask someone to review
Open the kept deck and choose Share. In the review-sharing area, turn on Anyone with the link and copy the review link. Use this link for feedback: public publishing links do not have comments.
Before sending, open the review link in a private browser window. Enter a reviewer name and confirm that you can open the deck and leave a comment. Names entered here are self-reported. For practice, pin this comment to the Timeline slide:
Please allow seven weeks in total, giving review and launch weeks 6–7.
A reviewer with the review link can comment without creating a Renza account. More on sharing and permissions.
6. Revise without replacing the link
Copy the reviewer's feedback. In revision-prompt.md, replace the feedback placeholder, then paste the instructions into the same Codex conversation. Ask it to edit the existing deck.html. Review the changes locally and run the check again.
Publishing wrote a small identity tag into your file: renza:id. Keep that tag and its value. Publish the same file again:
npx renza check deck.html
npx renza publish deck.html
This creates a new version of the same deck. Do not use --new, which deliberately creates a separate deck. Refresh the review link and check the revised Timeline slide and the existing comment; then reply or resolve it as appropriate.
Keep the slide order stable during this review. Comments currently refer to slide positions, so inserting or reordering slides can move older pins even if your slide IDs stay the same. Comments and versions explains the limitation.
You have completed the walkthrough when you can open the same review link, see the revision and find the original feedback. For your next proposal, start from a fresh copy of the kit, replace the fictional brief, and repeat.